I figured that it has been awhile since my last post so a quick update is necessary. I have not stopped working on the car or given up on the project. However, as I mentioned in the first post for this blog; I am working on a very minimal budget. That said, I have been spending most of my car time attempting to sell parts so I can fund the budget for new parts.
Just last week I bit the bullet and spent some money on a used set of powder coated stock reinforced (1994-1995) RX-7 rims with a set of Hoosier A16s good for at least a few more autocross events. I found these on the RX-7 enthusiast board and luckily the member was nice enough to give a fellow racer a great deal. As an added bonus I sold some extra fuel parts I had laying around that completely paid for the rims and tires.
Actual work on the car has been postponed for another couple of weeks as I am moving into a new place, where I will finally get my own garage!!! Sometime after my move-in date of April 15th will most likely be my next post. Planned mods for the near future include: brake upgrade, custom vented stock hood, ducting for IC, oil coolers and brakes, custom undertray and a transmission swap. It's a lot of work, but I need to get this car on the track!
Tuesday, March 31, 2009
Monday, February 9, 2009
Battery Not Included
With all the work I have put into this car in the past month or so it may be hard for some to believe that I haven't even started the car in over three months. The reason for this you ask. Well, when I got the car a little over a year ago the stock battery had been replaced with an Odyssey PC925, relocated to the back hatch behind the passenger seat, and left to sit for two plus years. I tried to revive that battery, but no such luck. A custom made box had been created in this process so I decided to get another Odyssey PC925 to replace the old one. Fast forward almost exactly a year and the new Odyssey battery won't take a charge anymore either. Well, to make a long story short I have been left a little short of impressed with Odyssey batteries and even though I had a nice custom made battery box for one I was not about to blow another $150 and pray that the third time would be a charm.
Instead, I turned to craigslist and found a three month old Optima Red Top for a mere $50 (yes, I know this is practically stealing). Due to the size difference the custom box had to be pulled. I test fit the Optima and due to my over zealous trimming of the rear bin on the previous battery install there seemed to be plenty of room for the Red Top.
I did some planning and worked with a friend to draw up some plans for a custom box to fit the new battery in the rear bin.
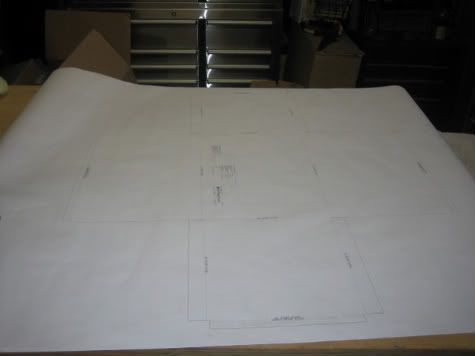
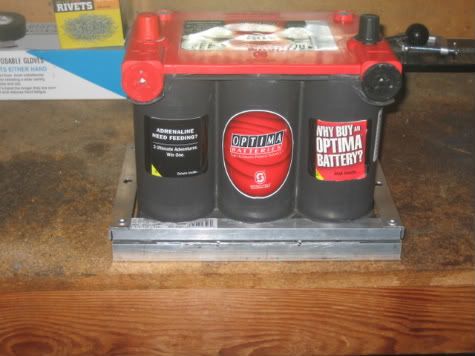
Fancy drawing yes, but I was lacking materials, motivation and time so I decided to go ahead and create a mount for the battery as a temporary fix to keep this Optima from being tossed about the car. I used some aluminum angle bar that I had laying around to act as a hold down for the base of the Red Top. Since this battery isn't perfectly rectangular I had to make some cuts to allow for proper clearance.
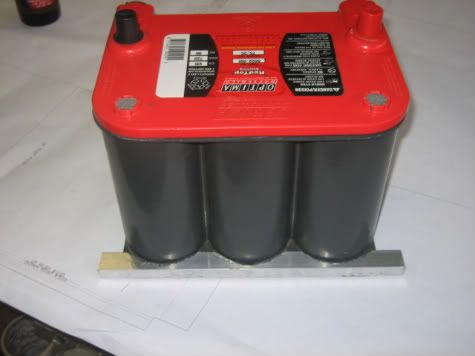
After I had finished up with the grinding my roommate showed up with lunch and I got a bit distracted for a little while, as mentioned previously motivation was an issue. After about a two hour break I was back to work. I had the front and rear mounts in place, but needed to make sides to allow for the bolts that would ultimately hold the battery to the tub of the car.
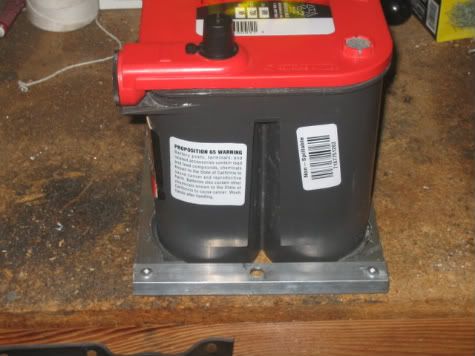
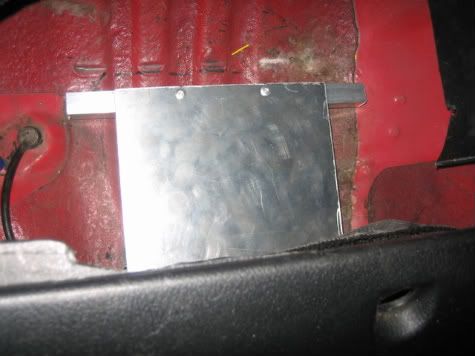
At this point I figured I was pretty much done, but when I went to dry fit my little creation in the car I realized that the floor pan was not a flat enough for the battery to mount securely. I decided to fix this problem by creating a small platform that would help to level out the mounting area.
After a bit of shimming and shaving the shelf was in place and bolt holes were once again ready to be drilled.
Anyone who has tried to work in the interior of an RX-7 can tell you there isn't much room to operate, drilling proved to be a much more difficult task than planned. I could not fit a drill in the area to drill the holes with the mount in place, so i had to make a template to create the room I needed to drill the holes. Once the holes were drilled and the bolts were cut and checked for clearance my new Optima took its home.
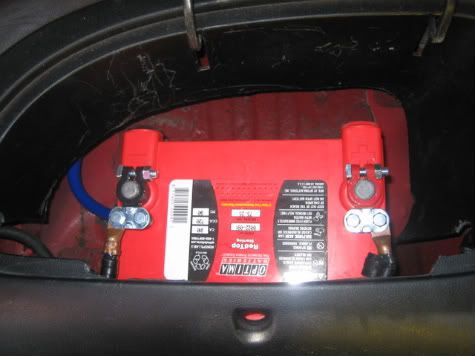
The box will be made another day when time and materials allow, but for now the battery is securely mounted and I can now start the car, drive it around and work on some of the other more important matters. Now all I have to decide is what to address next....
Instead, I turned to craigslist and found a three month old Optima Red Top for a mere $50 (yes, I know this is practically stealing). Due to the size difference the custom box had to be pulled. I test fit the Optima and due to my over zealous trimming of the rear bin on the previous battery install there seemed to be plenty of room for the Red Top.
I did some planning and worked with a friend to draw up some plans for a custom box to fit the new battery in the rear bin.
Fancy drawing yes, but I was lacking materials, motivation and time so I decided to go ahead and create a mount for the battery as a temporary fix to keep this Optima from being tossed about the car. I used some aluminum angle bar that I had laying around to act as a hold down for the base of the Red Top. Since this battery isn't perfectly rectangular I had to make some cuts to allow for proper clearance.
After I had finished up with the grinding my roommate showed up with lunch and I got a bit distracted for a little while, as mentioned previously motivation was an issue. After about a two hour break I was back to work. I had the front and rear mounts in place, but needed to make sides to allow for the bolts that would ultimately hold the battery to the tub of the car.
At this point I figured I was pretty much done, but when I went to dry fit my little creation in the car I realized that the floor pan was not a flat enough for the battery to mount securely. I decided to fix this problem by creating a small platform that would help to level out the mounting area.
After a bit of shimming and shaving the shelf was in place and bolt holes were once again ready to be drilled.
Anyone who has tried to work in the interior of an RX-7 can tell you there isn't much room to operate, drilling proved to be a much more difficult task than planned. I could not fit a drill in the area to drill the holes with the mount in place, so i had to make a template to create the room I needed to drill the holes. Once the holes were drilled and the bolts were cut and checked for clearance my new Optima took its home.
The box will be made another day when time and materials allow, but for now the battery is securely mounted and I can now start the car, drive it around and work on some of the other more important matters. Now all I have to decide is what to address next....
Saturday, January 31, 2009
Just Wing It
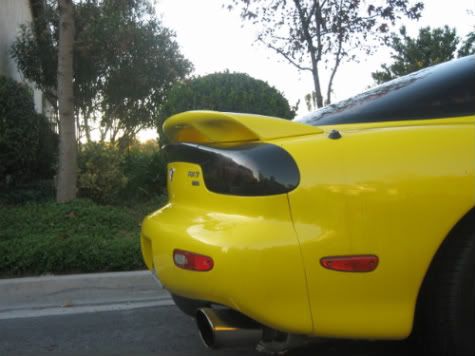
After helping a friend with an unexpected car issue I didn't have much time to work on the car. I decided that a quick spoiler upgrade would be the way to go. The stock R1 spoiler is a good looking piece, but just as with the bumper the '99 Spec spoiler has a bit more aggressive look and is functional in providing the car with some extra down force. This should come in handy on this tail happy import. I had mounted this wing previously, so all the drilling had already been completed and I make quick work of the swap.
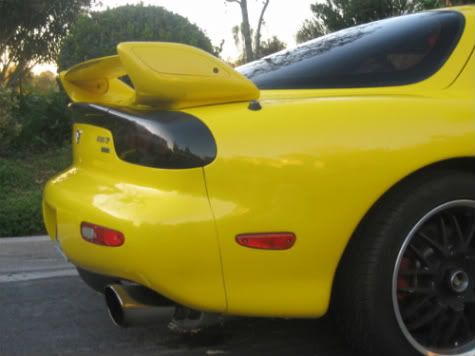
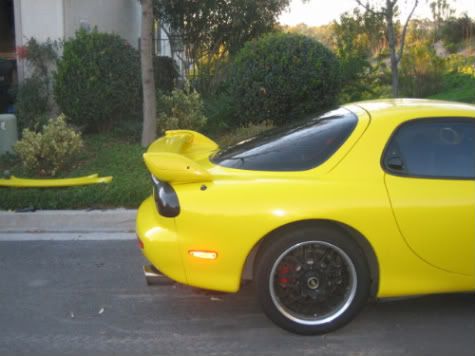
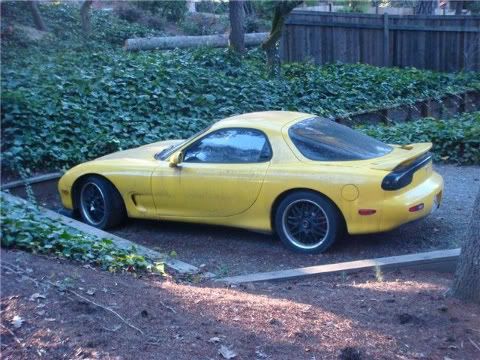
This is what the car looked like before I began.
When you pull off the original spoiler a new hole needs to be drilled between the two inner holes of the original mounting location to fit the mounting hardware of the '99 Spec wing.
Now I was ready to mount the new wing. Unfortunately the mounting hardware from the original R1 spoiler does not fit the '99 Spec spoiler. Fast forward the 25 minutes it took me to hunt down some hardware that I could use to bolt the new wing to the car and I was ready to go.
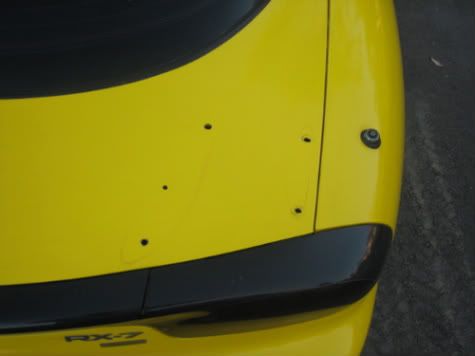
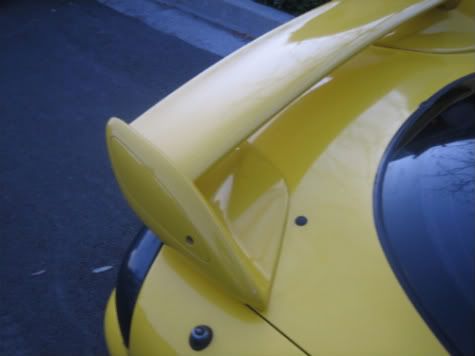
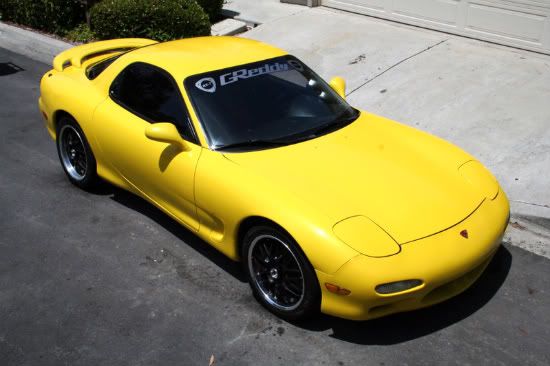
Last but definitely not least I needed to cover up the two holes that are left from the original mounting locations. I used a pair of body plugs as a temporary fix until I can get back in and weld in a plug. They may not look the best, but at least they will keep any rain or anything else from coming in through the back hatch. Attaching the wing is quick work and all that was left was to snap a couple of quick pics of a the new spoiler mounted atop the hatch.
This is what the car looked like before I began.
When you pull off the original spoiler a new hole needs to be drilled between the two inner holes of the original mounting location to fit the mounting hardware of the '99 Spec wing.
Now I was ready to mount the new wing. Unfortunately the mounting hardware from the original R1 spoiler does not fit the '99 Spec spoiler. Fast forward the 25 minutes it took me to hunt down some hardware that I could use to bolt the new wing to the car and I was ready to go.
Last but definitely not least I needed to cover up the two holes that are left from the original mounting locations. I used a pair of body plugs as a temporary fix until I can get back in and weld in a plug. They may not look the best, but at least they will keep any rain or anything else from coming in through the back hatch. Attaching the wing is quick work and all that was left was to snap a couple of quick pics of a the new spoiler mounted atop the hatch.
Sunday, January 25, 2009
Give it Some Air!
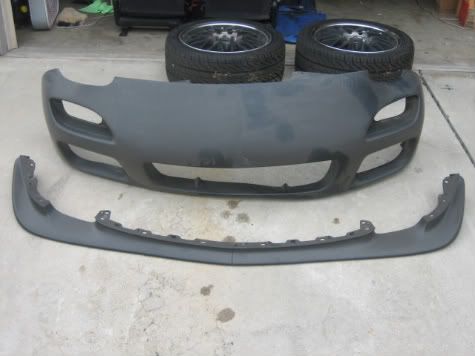
The RX-7 runs dangerously hot, so it is a must to get as much air as possible to the radiator, intercooler and oil coolers as possible. Luckily, the car I inherited already has a large intercooler and a v-mount radiator/intercooler set up to aide in air flow. Aftermarket front bumpers also help with airflow, and if I had my choice I would install a Mazdaspeed GTC front nose, but the budget just won't allow for that. I did however have a '99 spec urethane front bumper that was bought many years ago and had never been put on.
So, I decided to dust off the '99 spec bumper and see if I could get it to work. The bumper appeared to be in okay condition, but I was bit unsure due to the fact it seemed to be a bit warped. I wasn't too sure I could make it work on my own, so I recruited the help of my long time car friend Brent to give me a hand. I figured the bumper was free and Brent's labor comes real cheap, gotta love what people will do for free beer, and the bumper was just sitting around collecting dust so there was no reason not to try.
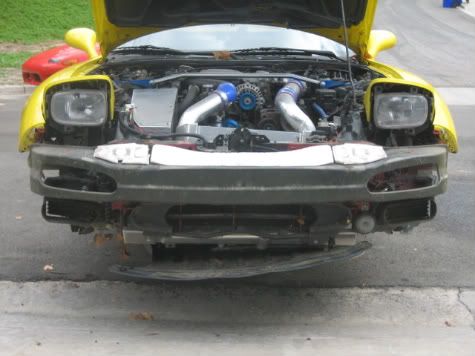
After we pulled the original front bumper off, and I almost found out the hard way that a couple of black widows had decided to nest on the backside, we placed the '99 spec bumper in place to see how it would fit against the original bumper support. The bumper support and a small portion of the backside of the bumper needed to be modified if I wanted to maker the bumper work. Below you can see the bumper support before and after the modification to the bumper support.
Before:
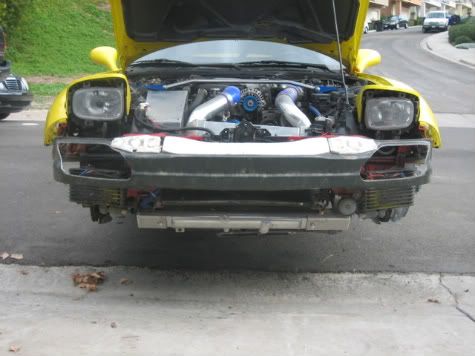
After:
After these adjustments were made we began the real fun because the new bumper didn't have any of the mounting holes drilled and it didn't have any of the metal mounting materials that come attached to the stock piece. So, we began the oh so fun process of drilling out the rivets on the original bumper, measuring for fitment and riveting the mounting pieces to the new bumper. This proved to be a challenging process as the new bumper didn't seem to want to cooperate. After bending, twisting, forcing things into place, and a couple of words not suited for this blog we finally got an acceptable fit for the bumper.
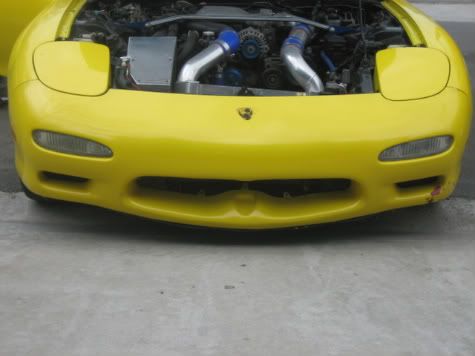
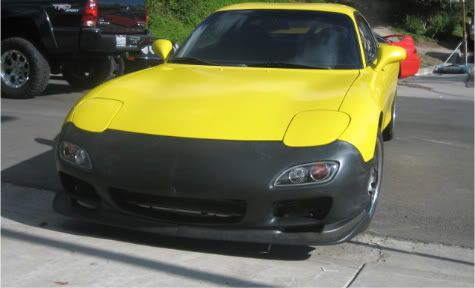
Now that we finally saw that the bumper would fit we pulled it right back off to outfit the bumper with the '99 spec front lip. This lip doesn't just look nice, but it will become functional later on down the road (I will save that post for another time). Brent went to work mounting the lip to the bumper while I attempted to clean up some of the wiring mess the car had under the hood. Once Brent had the lip mounted we installed the '99 spec turn lights ( yes, I know that I have said '99 spec about 100 times so far this post). After a day and a half of test fitting, drilling, riveting, cutting, putting the bumper on, taking the bumper off and test fitting some more the bumper was finally on. The final product is below and with a comparison to the stock bumper so you can see how this bumper will help the car get a bit more air to all the right places. Thanks Brent!!!
So, I decided to dust off the '99 spec bumper and see if I could get it to work. The bumper appeared to be in okay condition, but I was bit unsure due to the fact it seemed to be a bit warped. I wasn't too sure I could make it work on my own, so I recruited the help of my long time car friend Brent to give me a hand. I figured the bumper was free and Brent's labor comes real cheap, gotta love what people will do for free beer, and the bumper was just sitting around collecting dust so there was no reason not to try.
After we pulled the original front bumper off, and I almost found out the hard way that a couple of black widows had decided to nest on the backside, we placed the '99 spec bumper in place to see how it would fit against the original bumper support. The bumper support and a small portion of the backside of the bumper needed to be modified if I wanted to maker the bumper work. Below you can see the bumper support before and after the modification to the bumper support.
Before:
After:
After these adjustments were made we began the real fun because the new bumper didn't have any of the mounting holes drilled and it didn't have any of the metal mounting materials that come attached to the stock piece. So, we began the oh so fun process of drilling out the rivets on the original bumper, measuring for fitment and riveting the mounting pieces to the new bumper. This proved to be a challenging process as the new bumper didn't seem to want to cooperate. After bending, twisting, forcing things into place, and a couple of words not suited for this blog we finally got an acceptable fit for the bumper.
Now that we finally saw that the bumper would fit we pulled it right back off to outfit the bumper with the '99 spec front lip. This lip doesn't just look nice, but it will become functional later on down the road (I will save that post for another time). Brent went to work mounting the lip to the bumper while I attempted to clean up some of the wiring mess the car had under the hood. Once Brent had the lip mounted we installed the '99 spec turn lights ( yes, I know that I have said '99 spec about 100 times so far this post). After a day and a half of test fitting, drilling, riveting, cutting, putting the bumper on, taking the bumper off and test fitting some more the bumper was finally on. The final product is below and with a comparison to the stock bumper so you can see how this bumper will help the car get a bit more air to all the right places. Thanks Brent!!!
Sunday, January 18, 2009
The Vision
For the past few years I have been toying with the idea of getting back into racing and doing everything the legal way. No more canyon runs or stoplight to stoplight games like the ones I often found myself in as a teenager, but true track racing with NASA and SCCA. One major hurddle that kept me, and I'm sure many like me, off the track is the money needed to buy and build a car that doesn't double as a daily driver.
In the summer of 2000 one of my best friends purchased a 1993 RX-7 R1 with the hopes of having a car that he could drive and autocross when on leave from the Army. Since that time he and I have worked to do minor modifications here and there to better the car, but with the exception of a couple of trips to Infineon the cars has not seen any track time.
A few years went by and the car sat in Northern CA. In 2007 the car had been sitting for close to 2 years and my friend was living across the US in GA. We talked and it was decided that I would bring the car to San Diego with me toclean up and maintain. The car was in rough shape but the potential for the car to come alive again was there.
I got the car to San Diego, cleaned it up, got it running and started taking the car on cruises once in awhile.
In December of 2008 my friend gave me the greenlight to use the RX-7 to build a race car that could be competitive and fun to drive. Due to a minimal budget I am going to have to beg, borrow and barter, but then end result should be a car that is fun to take to the track and show at events throughout Southern CA. I plan on telling the story of the ups and downs of the build process, track days and car events as I work to complete the goals of Project R1.
Subscribe to:
Posts (Atom)